

Table of content:
- TypeScript Overview
- Setting up Vuejs with TypeScript in new project setup
- Setting up Vuejs with TypeScript in an existing project setup
- Using TypeScript with single file components
- Decorator $emit
- Decorator Watch
- Mixins in vue class components
- Important Notes
- Conclusion
# TypeScript Overview
Typescript is a superset for JavaScript but What does this mean?, well it means that is like a piece of enhancement that you add to your project and use it along with JavaScript, you can read more about it here.
You may be asking What benefits or advantages will provide the use of typescript? well my friend here I list some of then.
- Types are one of the best forms of documentation you can have.
- Code scalability.
- A Community that is supported by Microsoft it self.
- Type help to code quality in big teams
- Better understanding of the code.
- Easier to test and debug, It’s better for the compiler to catch errors than to have things fail at runtime.
- Code completion and IntelliSense. Intellisense provides active hints as a code is added.
# Setting up Vuejs with TypeScript in new project setup
Let’s begin by open our Terminal, write the following command (just in case you don’t have vue CLI in your machine, you can skip it if you do):
npm install --global @vue/cli
after this command finish executing write the following command command
vue create [your-app-name]
Here you will be prompt with a step wizard in the command line, select the first two options [babel and typescript] mark them with the space bar then hit enter to continue, leave all the rest with the default options, let it finish. Easy right? Now enter the folder created with the name of your project and run the server
cd [your-app-name]
then
yarn dev
Now you should get server running in the port localhost:8081 or :8080
Before we go beyond let me explain something about the files created in the project, you will see some files related to TypeScript config inside the src folder you will find a shims-vue.d.ts which helps your IDE to understand what a file ending in .vue is.
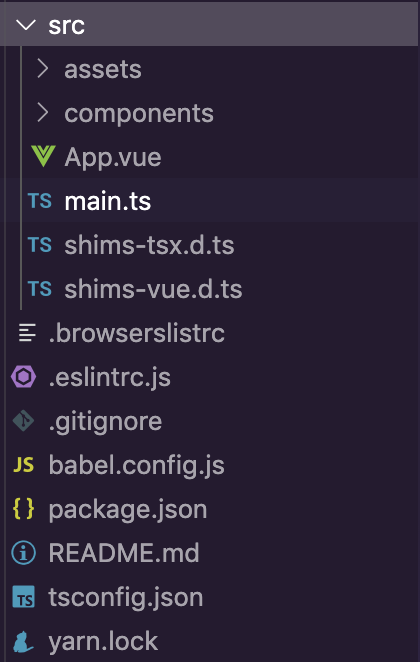
shims-tsx.d.ts allow you to enable JSX-Style typescript code in those files.
tsconfig.json in the root of the project is where the config of TypeScript, which is the folder with ts files, the types
of files to use with TypeScript, ES Module Version to use, it also specifies the root files and the compiler options required to compile the project. Read more about it
here.
# Setting up Vuejs with TypeScript in an existing project setup
First create tsconfig.json file in the root of your project and add this code snippet
{
  "compilerOptions": {
    "lib": ["dom", "es5", "es2015"],
    "target": "es5",
    "module": "es2015",
    "moduleResolution": "node",
    "sourceMap": true,
    "allowSyntheticDefaultImports": true
  }
}
Second you need to add ts-loader to your application, I’m assuming you are using webpack as bundler:
yarn add -s --dev ts-loader
Now lets update webpack.config.dev.js file, we need to add the new rule before the vue loader for other ts-loader to work
rules: [
  {
    test: /\.ts$/,
    exclude: /node_modules|vue\/src/,
    loader: "ts-loader",
    options: {
      appendTsSuffixTo: [/\.vue$/]
    }
  },
  ...
you need to rename your main entry file extension to .ts:
...
entry: {
  app: './src/app.ts'
},
...
You are now ready to use TypeScript within your project change the extension of any .js to .ts and inside the components you can now use TypeScript, add the lang="ts" on the script tag of your Vue file.
<script lang="ts">
So now let’s begin by writing a single file component. Ohh! yeah baby!!!
# Using TypeScript with single file components
Let’s begin by defining our vue class component structure using the vue-property-decorator & vue-class-component packages if your project is not new vue-cli add this packages by default, if you select TypeScript configuration at the beginning
<template>
<div class="page-layout" :class="cssLayout">
  <sidebar/>
  <slot name="content")></>
</div>
</template>

<script lang="ts">
import {Component, Vue, Prop} from "vue-property-decorator"
import Sidebar from "../components/Sidebar"
import Truncate from "../filters/Truncate"
import axios from "axios"

@Component({
  name: 'LayoutComponent',
  components: {
    Sidebar
  },
  filters: {
    Truncate
  }
})
export default class LayoutComponent extends Vue {
  @Prop({type: String, default: "light"}) public theme;
  //Data properties are now attributes of the class with types inference
  public loaded: boolean = true;
  public userData: UserDataInterface = {}

  //Computed properties are getters
  get cssLayout(): string {
    return this.theme === "light" ? 'background-color: #fff' : 'background-color: #444';
  }

  // hooks are registered as normal methods
  mounted(): void {
    this.getUserCredentials()
  }

  //method
  getUserCredentials(): void{
    const URL = '/api/currentuser';
    axios.get(URL).then((response: AxiosResponse)=>{
      this.userData = response.data.user
    })
    ...
  }

}
</script>
As you can see this is how you create a single file component with TypeScript, data properties can be attributes of the class, computed properties work as simple getters read more about this getters, hooks methods are written in the class as methods.
# Decorator for $emit
Here a good example of the @Emit() decorator:
import {Component, Vue, Prop, Emit} from "vue-property-decorator"

export default class Sidebar extends Vue {
  @Emit('onClickedLink')// if not parameter set the name of the below method will be used instead
  onClick(value: string) {
    return value;
  }
}
Then in the parent components:
<template>
<div class="page-layout" :class="cssLayout">
  <sidebar @onClickedLink="setActiveLink"/>
  ....
  ..
  .
#Decorator for watch:{} object
Here a good example of the @Watch() decorator:
<script lang="ts">
  import {Component, Vue, Prop, Emit, Watch} from "vue-property-decorator"
  export default class Sidebar extends vue {
    public opened: boolean = false;

    @Watch("opened") // attribute you want to watch
    onSidebarOpen(val: boolean) {
      if (val: boolean, old: boolean) {
        this.userOpenSidebar();
      }
    }
  }
  ...
  ..
  .
#Mixins in vue class components
Ok now, let’s talk about mixins, I had a hard time dealing with this when I first started working with Typescript in vuejs. But it doesn’t have to be that hard you would say… But if you don’t know is like you’re trying to play a guessing game.
Let see how we can overcome this:
First the mixing only containing <script lang="ts"></script> tag:
import { Component, Vue, Prop } from "vue-property-decorator";

@Component({})
export default class Checkout extends Vue {
  @Prop() public data: object;

  public get productPrice(): number {
    return this.product.price_cents;
  }
}
then the component you wish to use the mixin:
<script lang="ts">
  import { Component } from "vue-property-decorator";
  import { mixins } from "vue-class-component";
  import CheckoutMixin from "../mixins/Checkout";

@Component({
  name: "CartItem"
})
export default class CartItem extends mixins(CheckoutMixin) {
  //all methods and attributes will be available in this class now
  ...
}
To know more in deeps how this works under the hood I advise you to read the TypeScript docs about inheritance inheritance
#Important notes
tsconfig.json Contains compiler options and specifies the location of root files.
tslint.json Options and rules for Typescript linting, for TSlint.
app.ts The entry file for the project.
shims-tsx.d.ts Allows the use of .tsx files. Read more about this here.
shims-vue.d.ts Allows .vue single file components to be imported and used.
#Conclusions
We have learned to add TypeScript to an existing project with webpack. How to init a new project with TypeScript using the vue cli wizard. You saw the structure of a vue class component and its decorators methods.
The main point of having typescript enable in your app is to use types in your classes, objects & functions so when a bug emerge will be easier for you to detect the cause of the problem.
That’s all for this part, if you enjoyed this article don’t forget to follow me on twitter and subscribe to the newsletter to get weekly articles updates right in your inbox.
Thanks for reading!

